本文共 4256 字,大约阅读时间需要 14 分钟。

word中 有注释标签吗
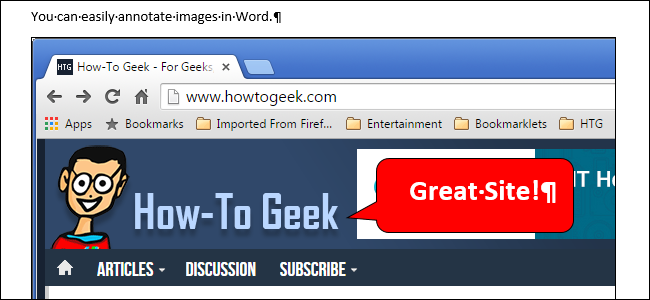
If you’re writing a document that includes images, you may want to add annotations to those images to clarify what they represent. You can add callouts to your images to point out particular parts of the image and add text to describe those parts.
如果要编写包含图像的文档,则可能需要在这些图像上添加注释,以阐明它们的含义。 您可以在图像中添加标注,以指出图像的特定部分,并添加文字来描述这些部分。
We will show you how to annotate an image directly in Word so you don’t have to use a third-party program.
我们将向您展示如何在Word中直接注释图像,因此您不必使用第三方程序。
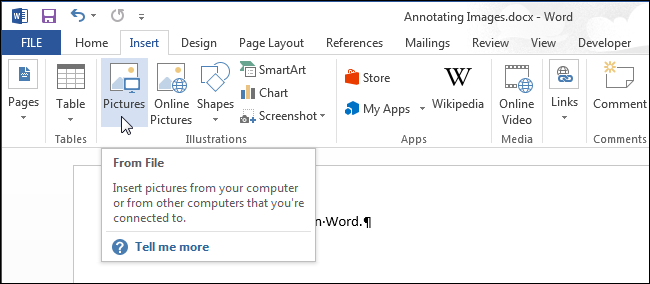
First, insert an image into your document. To do this, click the “Insert” tab.
首先,将图像插入文档。 为此,请单击“插入”选项卡。
In the “Illustrations” section, click “Pictures”.
在“插图”部分中,单击“图片”。
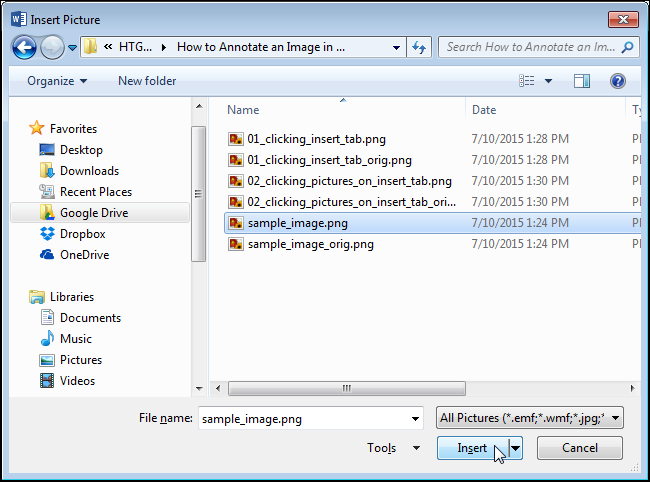
On the “Insert Picture” dialog box, navigate to the folder containing the image file you want to insert, select it, and click “Insert”.
在“插入图片”对话框上,导航到包含要插入的图像文件的文件夹,选择它,然后单击“插入”。
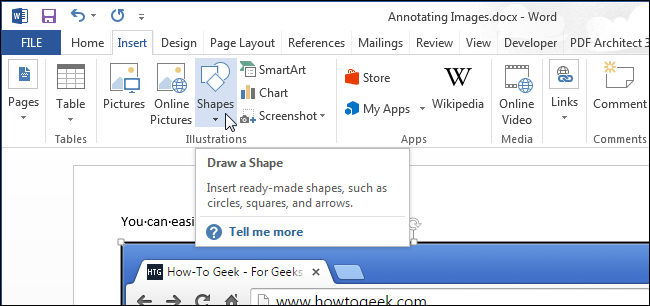
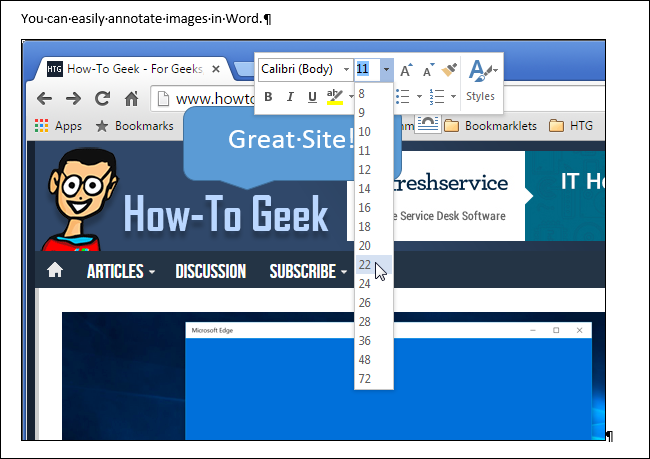
Make sure the image is selected by clicking on it. In the “Illustrations” section of the “Insert” tab, click “Shapes”.
确保通过单击选择图像。 在“插入”选项卡的“插图”部分中,单击“形状”。
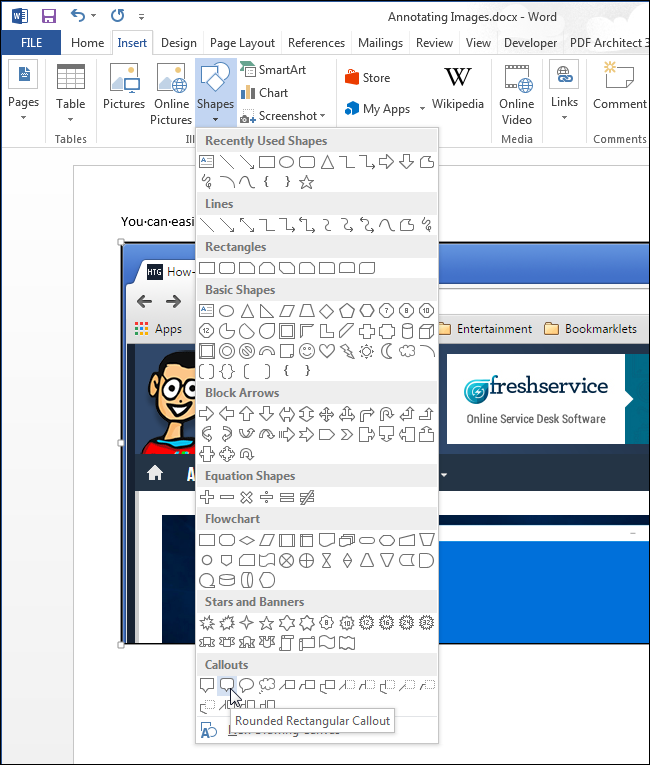
Click on one of the shapes in the “Callouts” section of the drop-down menu to select that shape.
单击下拉菜单的“标注”部分中的形状之一,以选择该形状。
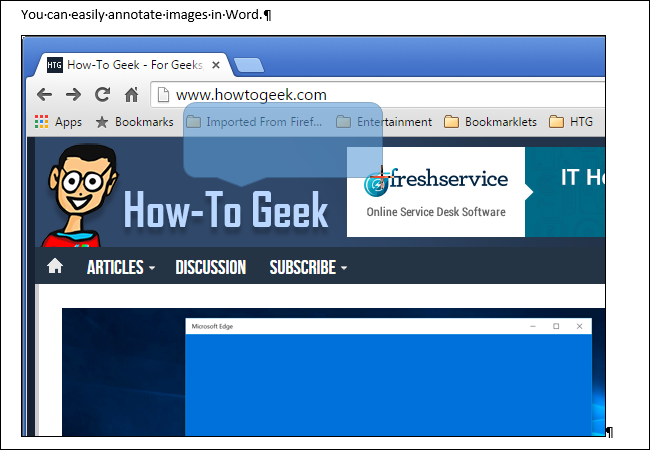
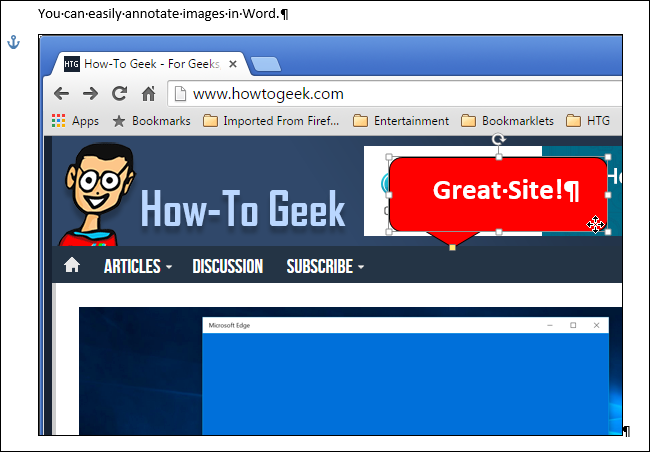
The cursor changes to a big “+” symbol. Click and drag on the image to define the size and location of the callout.
光标变为一个大的“ +”符号。 单击并在图像上拖动以定义标注的大小和位置。
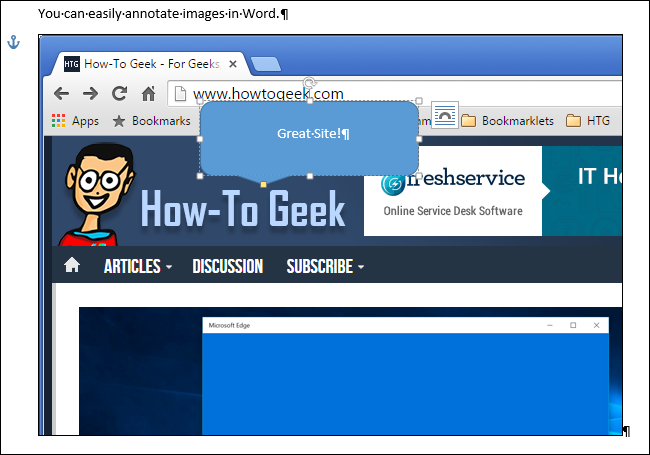
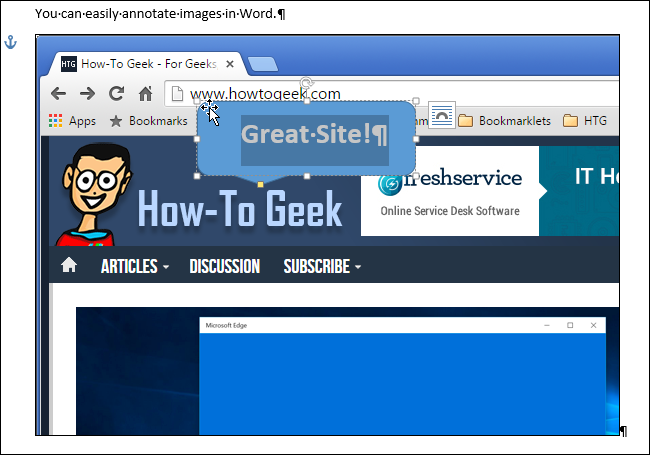
Once you’ve defined the size of the callout, the cursor is automatically inserted into the center of the callout. Start typing to enter your text.
一旦定义了标注的尺寸,光标就会自动插入标注的中心。 开始输入文字。
You can change the font, font size, and font style by selecting the text in the callout and selecting options from the mini toolbar that displays. If you’ve , you can use the formatting commands on the “Home” tab to format your text.
您可以通过选择标注中的文本并从显示的迷你工具栏中选择选项来更改字体,字体大小和字体样式。 如果您,则可以使用“主页”选项卡上的格式化命令来格式化文本。
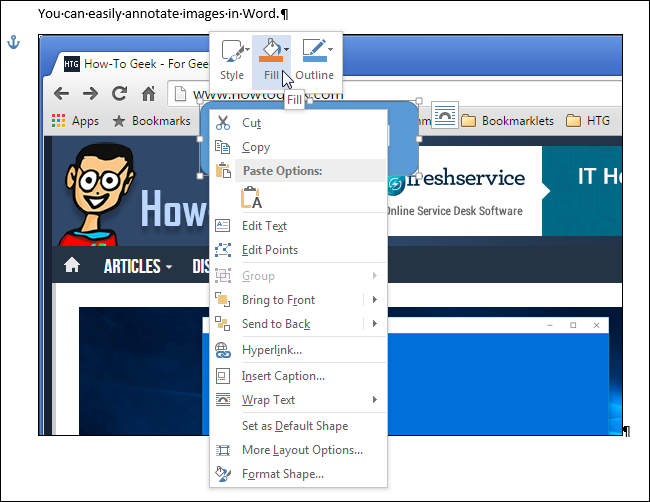
The fill color and outline color can also be changed. We’ll start with the fill color. Move your mouse toward the edge of the callout until it becomes a pointer with a crosshair.
填充颜色和轮廓颜色也可以更改。 我们将从填充颜色开始。 将鼠标移到标注的边缘,直到它变成带有十字准线的指针。
Right-click on the callout and select “Fill” from the popup box above the popup menu.
右键单击标注,然后从弹出菜单上方的弹出框中选择“填充”。
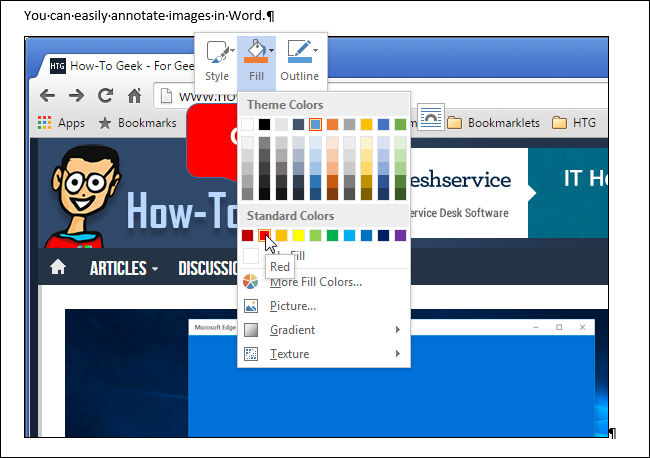
Select a color from the “Theme Colors” section or the “Standard Colors” section of the drop-down menu. You can also access more colors or define a custom color by selecting “More Fill Colors”, experiment with a “Gradient” or a “Texture”, or use a “Picture” as the background on the callout.
从下拉菜单的“主题颜色”部分或“标准颜色”部分中选择一种颜色。 您还可以通过选择“更多填充颜色”,尝试“渐变”或“纹理”或使用“图片”作为标注的背景来访问更多颜色或定义自定义颜色。
To change the outline color, right-click on the callout again and click “Outline”. Select a color for the outline of the callout, or select “No Outline” if you want to remove the outline. Select “More Outline Colors” to access additional colors or create a custom color for the outline. You can also specify the “Weight” of the line and whether the line is composed of “Dashes” rather than a solid line.
要更改轮廓颜色,请再次右键单击标注,然后单击“轮廓”。 为标注的轮廓选择一种颜色,如果要删除轮廓,请选择“无轮廓”。 选择“更多轮廓颜色”以访问其他颜色或为轮廓创建自定义颜色。 您还可以指定线的“权重”以及线是否由“短划线”而非实线组成。

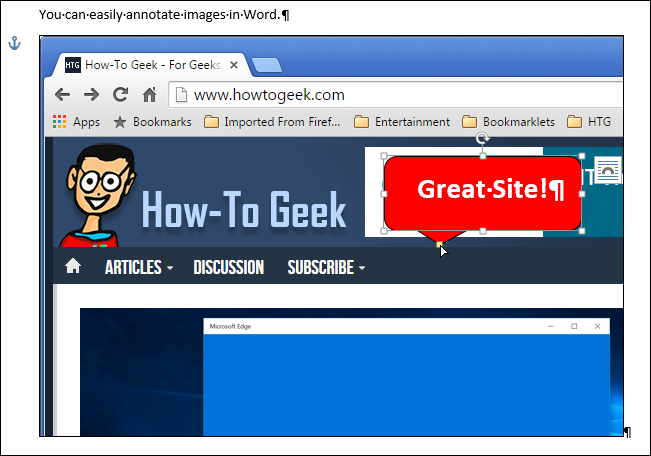
If you don’t like the position of the callout, move your mouse over the callout until it turns into a pointer with a crosshair. Click and drag the callout to the desired location.
如果您不喜欢该标注的位置,请将鼠标移到该标注上,直到它变成带有十字准线的指针。 单击并将标注拖动到所需位置。
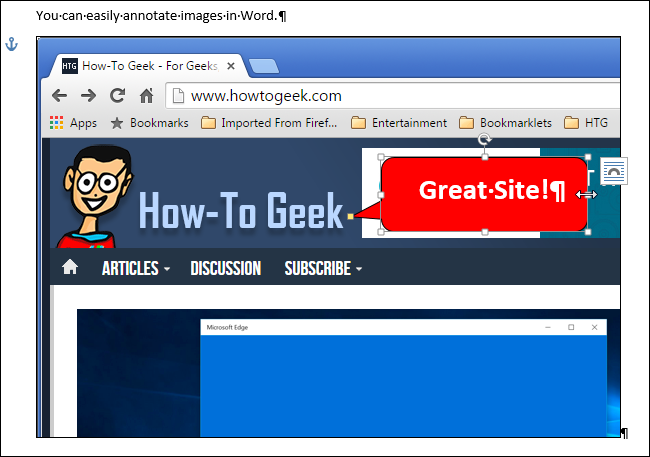
Once you’ve moved the callout, you may need to reposition the callout arrow to point where you want. To do this, move the mouse over the callout until you see the pointer with the crosshair and then click on the callout to select it. Move the mouse over the handle at the end of the callout arrow until the cursor becomes a small arrow.
移动标注后,您可能需要重新定位标注箭头以指向所需的位置。 为此,将鼠标移到标注上,直到看到带有十字准线的指针,然后单击标注以将其选中。 将鼠标移到标注箭头末端的手柄上,直到光标变为小箭头。
Click and drag the handle to move it where you want. The whole callout arrow moves to the appropriate side of the callout.
单击并拖动手柄,将其移动到所需位置。 整个标注箭头将移至标注的适当一侧。
Use the other handles on the callout to resize the callout. When you move your mouse over a handle, the cursor turns into a double ended arrow. Click and drag to resize the callout.
使用标注上的其他控点来调整标注的大小。 当您将鼠标移到手柄上时,光标会变成一个双头箭头。 单击并拖动以调整标注的大小。
Experiment with adding other types of shapes, lines, and text to your images using the “Shapes” on the “Insert” tab.
尝试使用“插入”选项卡上的“形状”将其他类型的形状,线条和文本添加到图像中。
翻译自:
word中 有注释标签吗
转载地址:http://ditwd.baihongyu.com/